
Use the Auto Import/Export settings to enable automatic import and export of estimating files and to configure how imported files are stored.
Automatic file import takes place from the file selection area of the Mitchell Estimating main window.
How to
- On the System Info menu
-
On the Preferences dialog box,click the Import/Export tab.

-
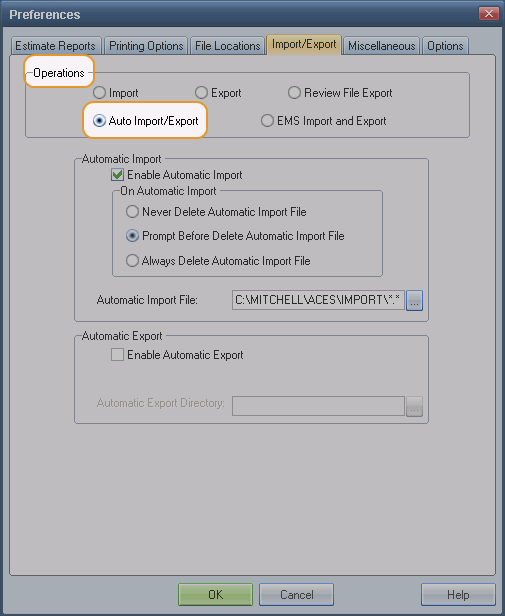
Under Operations, click the Auto Import/Export option.

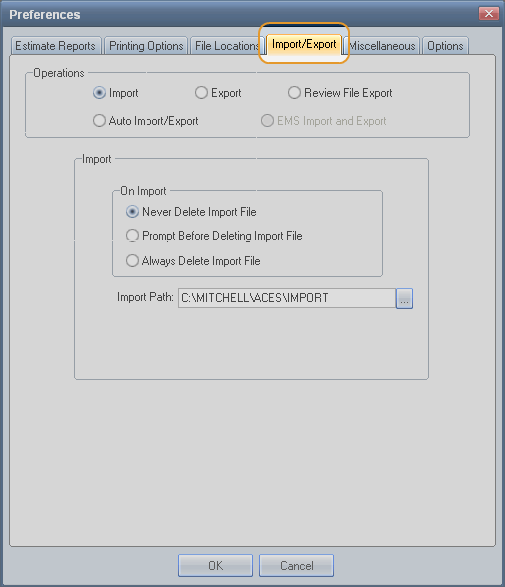
- On the Preferences dialog box, click the Import/Export tab.
- Under Operations, click the Auto Import/Export option.
- Under Automatic Import, select the Enable Automatic Import check box.

- Under On Automatic Import, select an option for deleting imported files (Never Delete, Prompt Before Delete, or Always Delete).
- Enter the path to the Automatic Import File. This is where files to be imported are located.

- On the Preferences dialog box, click the Import/Export tab.
- Under Operations, click the Auto Import/Export option.
- Under Automatic Export, select the Enable Automatic Export check box.

- Enter the path to the Automatic Export Directory. This is where you want to export files to.

Reference
|
Automatic Import |
|
|
Enable Automatic Import |
Select this check box to enable and configure automatic import. |
|
Never Delete Automatic Import File |
Select this option to keep imported files. Note: To conserve disk space, remember to delete import files on a regular basis. |
|
Prompt Before Deleting Automatic Import File |
Select this option to receive a prompt to confirm deleting files that are automatically imported. |
|
Always Delete Automatic Import File |
Select this option to always delete files that are automatically imported. |
|
Automatic Import File |
Identify the directory where files to be imported are located. Note: The system imports files when you start your computer. |
|
Automatic Export |
|
|
Enable Automatic Export |
Select this check box to enable and configure automatic export. |
|
Automatic Export Directory |
Identify the directory where you want to export the files. Note: The system imports files when you start your computer |
|
See also: |
