
Use the Messages profile tab to store custom messages and disclaimers that can be added to the printed estimate.
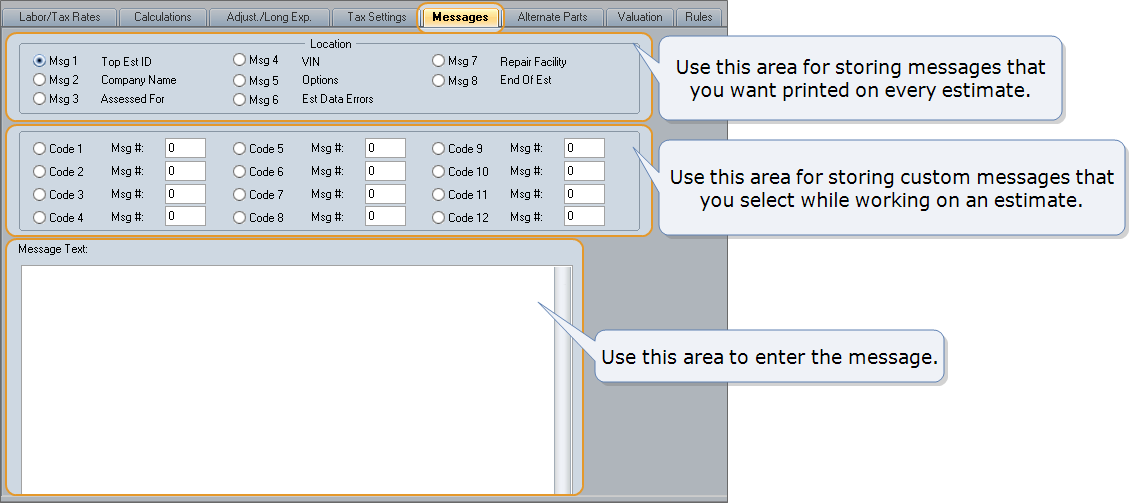
- Use the Location area of the tab (Msg 1 – Msg 8) for storing messages that you want printed on every estimate.
- Use the middle area of the tab (Code 1 – Code 12) for storing custom messages that you select while working on an estimate.
- Use the Message Text box to enter the message.
You can also change the default deductible or betterment credit disclaimer if one or both of these credits has been applied to the estimate.
How to
-
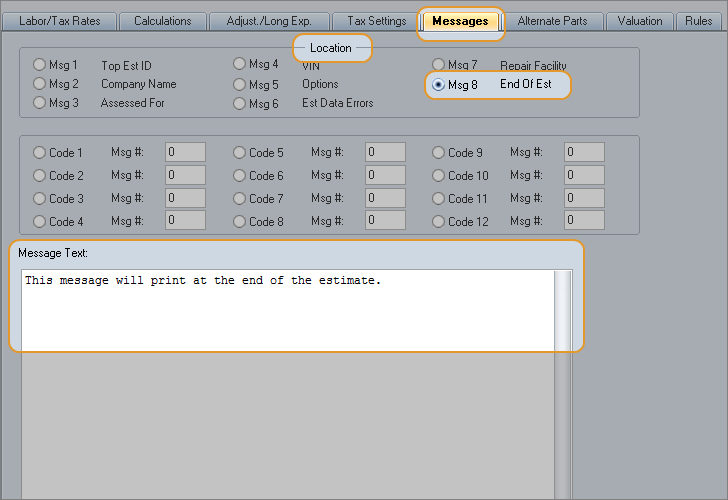
Under Location, click the Msg number that represents where you want the message to print on the estimate. For example, to print the message at the end of the estimate, click Msg 8.

- In the Message Text box, type the message.
-
Repeat this process for other messages you want to add, and then click Save.
These messages will automatically print on every new estimate using this profile.
-
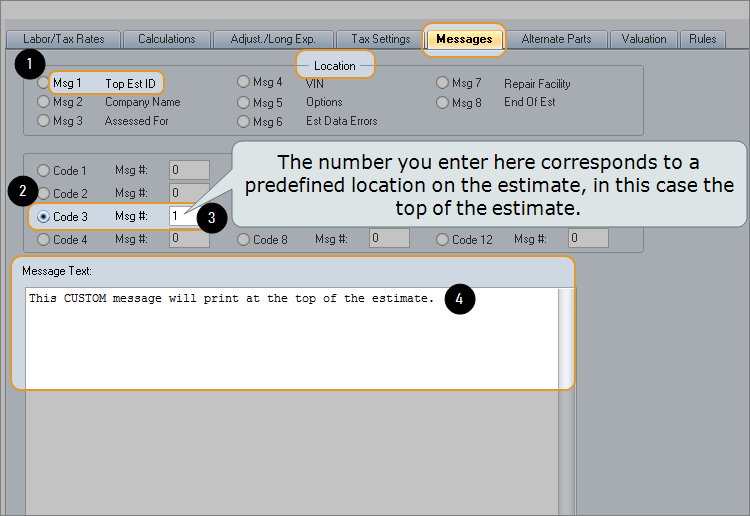
Under Location, identify the Msg number that represents where you want the message to print on the estimate. For example, to print the custom message at the top of the estimate, click Msg 1.
-
Next, select the Code number you want to use (1–12).
Tip: You can pick any code number, but remember which one you choose because you will select this number in the estimate when you want to print the message. More about this in the next procedure.
For this example, let's say you're going to use Code 3 for your custom message.
-
Then, enter the Location number you identified in step 1 in the Msg # field for the Code number you selected. In this case, you would enter 1 in the Msg # box for Code 3.

- In the Message Text, type your custom message.
-
Click Save.
This custom message is now available to print on individual estimates that use this profile. Remember the Code number, and then go to the next procedure to learn how to print this custom message on an estimate.
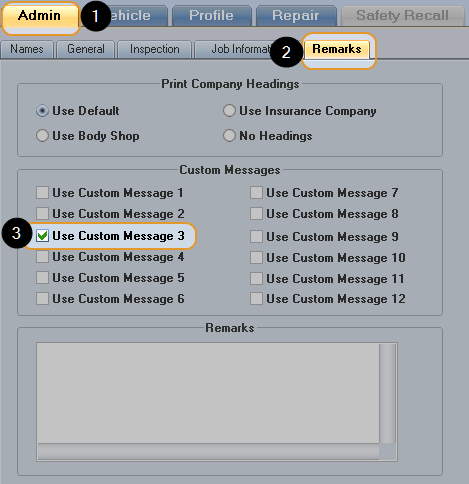
- Create an estimate using the profile with the custom messages.
- On the Admin tab, click the Remarks subtab.
-
Under Custom Messages, select the Use Custom Message check box that corresponds to the Code number you used to set up your custom message.

The custom message will print on this estimate only.
- To change the check box label so it identifies the message, see Customize Field Names.
|
See also: |
